Wednesday, 17 May 2017

Future Development/Conclusion


I feel I have achieved a lot in this project, and while it may not look 100% professional, I feel I have produced professional level functionality within my UI and Menus.

I think for future development I would like to try to add the following features:
Equipment management
Item upgrades
Loot Drops
Shooter improvements
Customisation
Multiple Weapons

During the development of these menu and UI objects I have learned a lot about advanced functionality in Unreal Engine 4 as well as HCI in general.

I have learned the importance of UI Theme and colours in making a project feel like a full coherent product as well as how this affects and guides the player's feelings towards the game.

Using Render Targets to create advanced effects with off-screen cameras capturing things to be used as HUD elements. I think this is really interesting and has a lot of applications in other areas.

Implementing Controller support into Menus was much more difficult than I anticipated, but I achieved what I had set out to do. I feel that Epic could have made this process more streamlined with one simple option added to their menu button system.

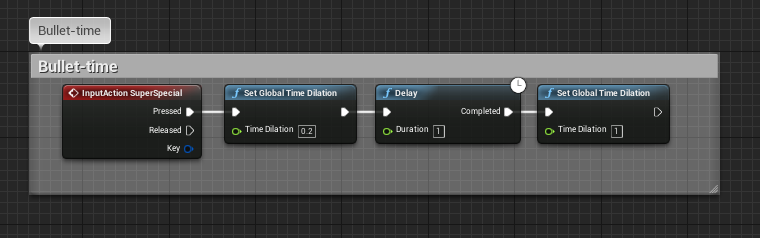
I found Implementing Shooter Game Mechanics relatively simple after experiencing the melee character implementation in a previous unit.

Line Trace was used for a couple of things in this project, and I think it will become very useful in future developments.

Replicating Customisations onto in-game Characters I think will become very useful, especially if I introduce loot and equipment management.

Physics Constraints, Physics Assets and using Physics objects as character parts was an interesting experience and I think it will come in useful at a later time.

Tuesday, 16 May 2017

Mini Map/Map Screen

I decided a good addition to the UI would be an on-screen mini map, and a real-time map screen.

These are both achieved in a similar way and use the same objects for both.

I started by creating a copy of the actual game map under the level, just without any roof pieces to allow for overhead cameras (this is important).

I made the walls black so that they would show up more clearly on the map screens.


For the mini-map, I needed a camera that would follow the position of the player on the map and clearly show the position.

I created a blueprint object with a green arrow piece and a camera with a render target pointing down on it attached.


This blueprint simply updates it's own  position based on where the player character is located (minus the depth at which the duplicate map is positioned).


And for tracking enemies, there is a similar red arrow blueprint, but the difference is that these objects are actually passive and do not have any code in themselves. They are spawned by each enemy when they are created, then receive their position from the enemy itself as it moves around.

And here's the code inside the enemies that communicate with the objects. You can see that when they are spawned they are assigned to a variable which is then used as the target for the positional updates.


For the main map screen, I just have another camera in the world with a scene capture that can see the whole map. All of the tracker objects from the mini map are visible which allows the user to see their own position, enemies and health pickups.

You can see both of these maps in action in the screen shot below. Notice how the mini-map rotates with the player character and the main map shows everything in relative position.

Monday, 15 May 2017

Ranger Character Implementation - Gameplay Mechanics

Following on from the setup for physics parts and animations, I began adding gameplay elements.

To control the gun, I used what I had learned from the menu toy and used a Line Trace from the camera centre out to find what was hit. I didn't use the gun as the origin of the line trace as this would be too unpredictable with the character animations moving the model around.

Here is a shot of the code for the aiming and firing.


It looks complicated, but the basic jist is we are firing out a line trace from the camera, detecting what has been hit, then using the Apply Point Damage transfer we set up for the melee character, using the line trace hit object as the target.

I have a variable that tracks ammo, which I have set up to be 10 shots before re-load. The re-load animation plays if the player presses fire with zero bullets, and this refreshes the total. This variable is linked to the ammo counter in my shooter UI which I will show further down.

I created a UI Widget with an aiming reticule in the centre, which is displayed whenever the player enters aim mode. I already moved the player camera off to the right of the character model in the viewport. When the player enters Aim mode, a Field of View zoom takes place to make the player feel more accurate.


You can also see the Ammo counter in this screen shot which reduces with each shot, then replenishes when you re-load.

Extra Gameplay Mechanics

I added a couple of extra gameplay mechanics to the shooting for some variety.

There is a bullet time which uses a timed Time Dilation node to slow the action down for a short period


I also added an AOE blast attack to save you from getting cornered by a large group or enemies. The core of this is a Radial Impulse on the character which is activated by a button press.


This sends the enemies flying away, plus I added an explosion particle effect to this ability.

Sunday, 14 May 2017

Ranger Character Implementation - Setup and Physics

Since we were implementing a character selection, I thought it was a perfect opportunity to try and implement a second gameplay type.

In a previous project, we had been tasked with designing and creating a character. I am using this as the basis of my second character.


I first uploaded the model to Mixamo to get it quickly rigged, then used the site to download some relevant animations along with the rigged character.


I imported these into Unreal Engine 4 so I could get started on the gameplay mechanics.

As this character is a Ranger, I also imported the gun model I made for the character to use as the weapon model.


Using the UE4 3rd Person example character, I built my character, replacing the model and adding sockets to hold the gun model.


I set up a basic walk/run blend for the non-aimed mode, then I used the directional run animations to create a multi-directional BlendSpace for use when the character aims the gun so that the animations blend smoothly in all directions.


I wanted the tail and hair to have physics simulation, so this involved creating separate rigged skeletal mesh versions of the two parts in Maya.


Then importing them into UE4 as skeletal meshes with physics constraints.


Which I then attached to the character blueprint using sockets.

Saturday, 13 May 2017

Direction Arrow

Due to the way the Boss character jumps around the area, I realised I needed an on-screen way to track the location of the character.

I took inspiration from the Crazy Taxi direction arrow, which guides the player towards their destination.


While this is a 3D arrow, I needed a way to render it to the screen as a 2D UI Element.

I started by creating my Arrow Object and encasing it in a 'Blue Screen' kind of shell to isolate it from the surroundings and give an easy colour contrast to make into the alpha later in the process.


I used a Render Target material to capture the arrow from the camera's point of view.

To isolate the Arrow and make the background transparent, I created a Material which removed all blue from the Material as an Alpha, which translates to transparent in the UI system.


To rotate the arrow object, I used code that set the player character as the origin and the Boss as a look-at target for the arrow, I then removed the player camera rotation from the YAW value so that it would stay relative to the camera rather than just the player model to avoid confusion.


And here's how it appears in-game on the UI:

Friday, 12 May 2017

Customisations

For my character customisation I wanted to offer several options and several interchangeable parts, as well as the ability to rotate the character to view your customisations.

To capture the controller and mouse rotate values, I had to use variables in the dummy character to capture the values, which then triggered event dispatchers.


These event dispatchers are then linked to custom events inside the character select object, which use the variables to update the rotation of the character depending on the controller used.


For clothing/armour I added a Bracer which can be toggled on or off.

For Weapons, the user can change the appearance of their Main Sword, Shield and Great Sword. This will also replicate onto the character in the game.


This is achieved using Arrays of objects in the Game Instance, then using a construction script to create the character.

The menu code communicates to the character select blueprint to iterate up or down through the object array, then update the look on the character. The code for the Shield is shown below, but they all act in much the same way.


Once these options are set, when the game loads, the character blueprint runs a construction script to add the chosen weapons to the character and toggle on/off the bracer.


Which results in the correct items being displayed in-game on the character model.

Thursday, 11 May 2017

Character Select

This menu has controller support, to read how this was achieved, please read the post titled Menus with Controller Support.

On the character select screen, I wanted each character to be highlighted when not just the player hovers the character model, but also when the buttons are focused on the UI using the controller or the mouse.

To achieve this effect, I had to use code in the character objects to check the highlight status of the buttons in the menu.

When the menu is created, it is added as a variable in the Dummy Character. As long as we keep it as a variable, we can read the status of elements inside it.

The code in the character objects check the variable and get the focus status of their respective button, then use this to choose whether to turn on or off their highlight.


and the result is: